DIY Logic Cookies

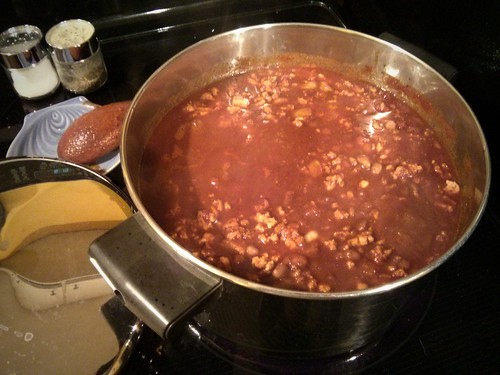
For the last two years, I’ve made Logic Cookies for the National Day of Reason. My first attempt in 2016 resulted in edible cookies but they had numerous problems including less than tasty cookies, soft icing that prevented stacking, and a sub-optimal cookie shape. I’ve patched up most of the issues for 2017 and succeeded well enough that it’s time to release the plans. The 2017 recipes are pretty standard sugar cookie and royal icing recipes with minor tweaks. I changed the cookie shape to hexagonal this year instead of circles. Hexagons are an ideal shape for Logic Cookies because the cookies can be cut with no wastage due to the ability to achieve a perfect 6.6.6 tessellation of the Euclidean cookie dough plane.

With the plans below, you’ll be ready to bake your own logic cookies for the next National Day of Reason, which is coming up on 3 May, 2018. If you make some, please comment below and maybe provide a link to your photos!

See more photos of my 2016 Logic Cookies and my 2017 Logic Cookies on Flickr.

Cookie recipe

8 Tbl (35 ml) (1 stick) butter
0.75 cup (177 ml) sugar
1 Tsp (5 ml) baking powder
1 Tsp (5 ml) true cinnamon (Ceylon cinnamon)
0.25 Tsp (1.23 ml) salt
1 egg
1 Tbl (35 ml) milk
1 Tsp (5 ml) Vanilla
2 Cups (474 ml) flour

Beat butter for 30 seconds. Add sugar, baking powder, salt, cinnamon, beat until combined. Add milk, egg, vanilla, beat until combined. Add flour, beating in as much as possible, then finishing with a spoon if needed. Divide dough in half, flatten, cover with was paper and chill in refrigerator for at least 30 minutes.

Preheat over to 375℉. Roll dough on lightly floured surface to 1/4 inch (6.4mm) thick. Cut into 2.5 inch (63 mm) hexagonal shapes. I used Ateco 5251 Plain Edge Hexagon Cutters in Graduated Sizes. Place cookies on non-stick cookie sheet and bake for 8-10 minutes. Cool on wire racks before icing.

Royal Icing recipe

2 cups (226 grams) powdered sugar
1 Tbl (10 grams) meringue powder
1/8 Tsp (0.6 ml) Cream of Tartar
3.5 Tbl (35 ml) water
1 Tsp (5 ml) vanilla extract
1 Tsp (5 ml) light corn syrup (optional for shiny finish on hardened icing)
Food coloring

Combine powdered sugar, meringue powder, and Cream of Tartar with whisk. Add water and vanilla extract. Beat for 10 minutes or until very thick. Separate out a small portion of the icing (approximate 1/8 of it) into a different container for later use in creating the symbols. Add a few drops of your desired food color to the main portion of icing and beat until evenly colored.

Apply color background icing in a thin even coat to each cookie using any preferred icing application method. Let icing cure for at least 10 minutes. Apply the white icing set aside earlier to form logic symbols using your desired method. If you use a piping bag or icing syringe, you will need to thin the white icing with small amounts of water until it reaches a consistency that works with your device of choice.

Let completed iced cookies cure exposed to the air for 12 hours to allow icing to harden.
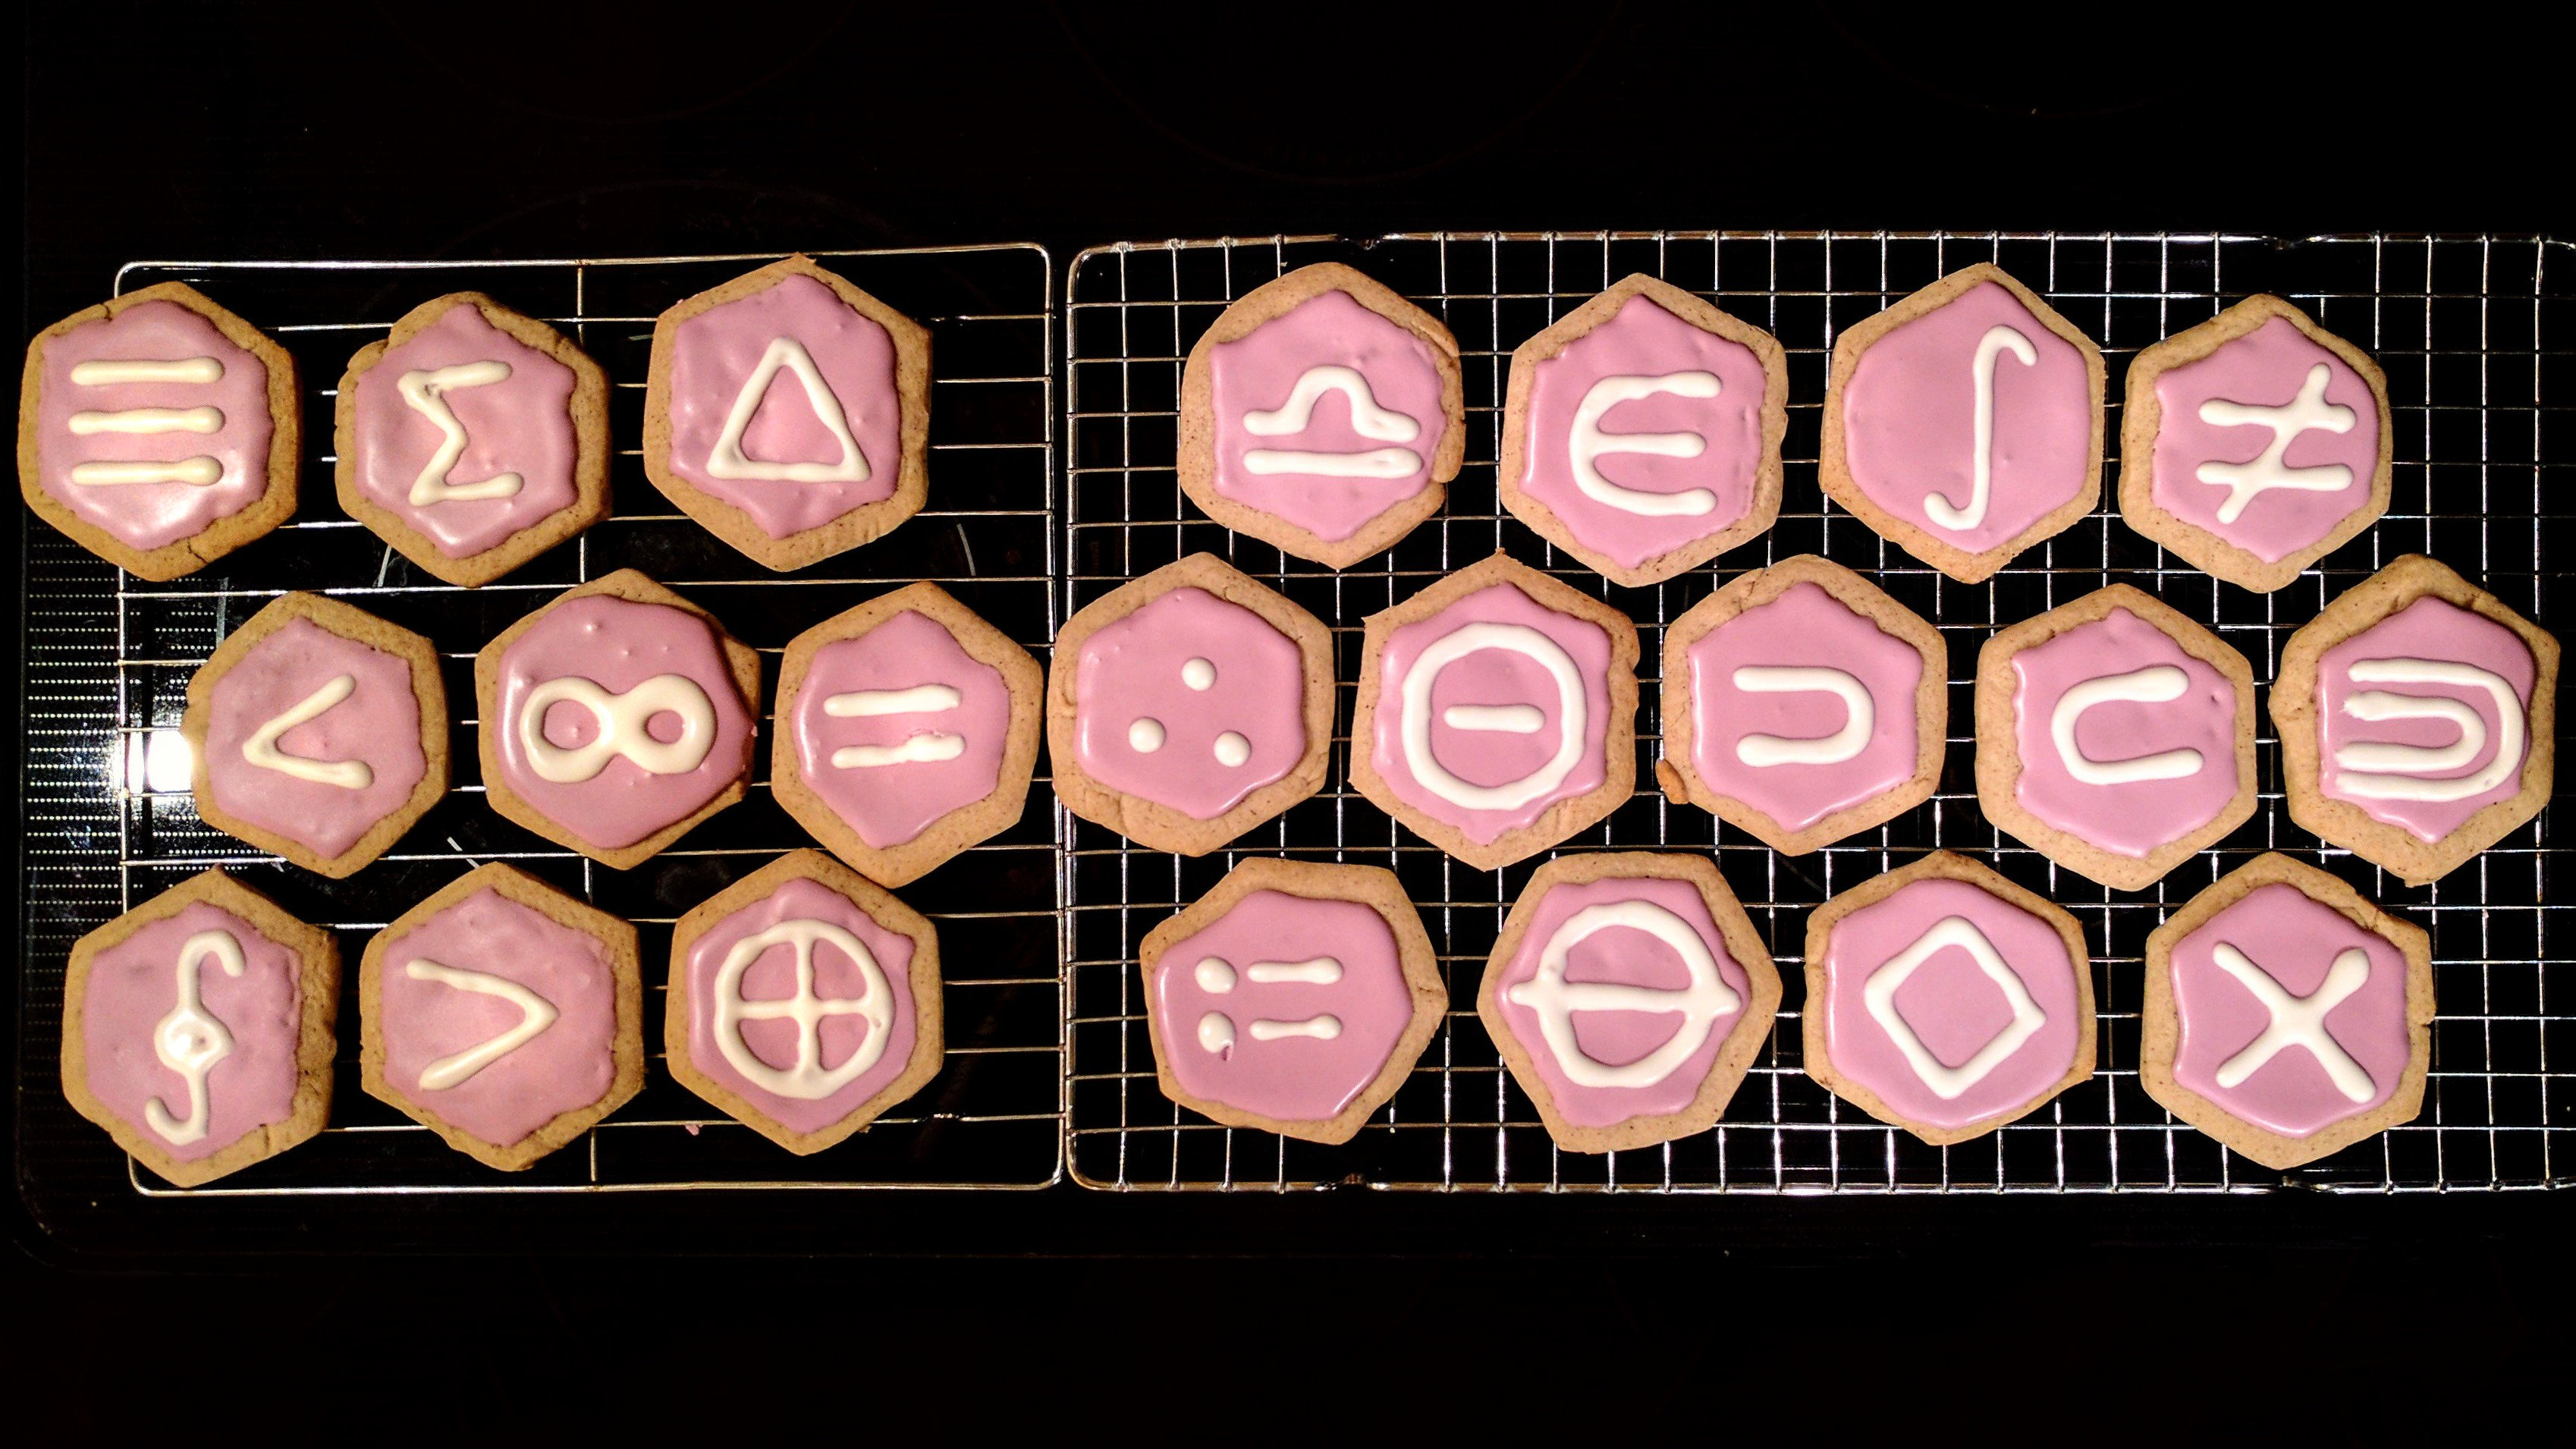
Symbol table

This is the current collection of symbols I’ve used on my 2016 and 2017 Logic Cookies. I’ve included a variety of symbols from the fields of symbolic logic, set theory, boolean algebra, algebraic logic, and other fields. I also included Gottfried Leibniz’s integral symbol and Leonhard Euler’s summation Sigma. Feel free to expand this list. The follow table uses Unicode values for the symbols so it may not display correctly on older or non-standard web browsers.

∞ Infinity
≔ Definition / Assignment
≡ Material Implication
⊃ Implication / Superset
∪ Union
∩ Intersection
∈ Element of a set
⊆ Subset equal
⊊ Subset not equal
⊂ Subset of
⊇ Superset of
⋑ Double Superset
⨯ Cartesian product
≏ Difference
∅ Empty set
⊖ Symmetric difference
∆ Difference (delta)
∴ Therefore
◇ Possibility
∨ Disjunction
∧ Logical and
⫮ Negation
⊕ Exclusive Disjunction
> Greater than
< Less than
= Equal
≠ Not equal
Σ Sigma (summation)
∫ Integral (Leibniz calculus)
∮ Integral – contour
⨙ Integral – intersection

Rainwater Reptile Ranch Chili

It’s hard to believe I’ve been blogging for more than a decade and never posted the recipe for the Rainwater Reptile Ranch chili. The weather has been cold this weekend. We just made a big batch of it last night and the recipe card is sitting here in front of me. This recipe has evolved and changed over the years. It started out when I was dating Susan and wanted her to experience this staple of Texas cuisine. That early attempt was based on reverse engineering the ingredients listed on a package of Wick Fowler’s 2 Alarm Chili that I spotted in a grocery store. I figured if I had the right stuff in approximately the right proportions and threw it all in a pot, I’d get close. Every batch changed for a few years as we consulted other chili recipes and made patches. It eventually began to stabilize into this recipe. The cinnamon is a nod to the Cincinnati variety of chili Susan experienced in her college days.

It will be obvious as you read the ingredients list that we are not chili purists by any means. We add beans, tomatoes, and even use alternative meats in our chili. I blame my parents. They raised me on a chili recipe that would barely fit even the most liberal definition today. It was more like a ground beef stew or soup than actual chili. I’ve had a lot of different bowls of chili in my life and loved most of them. So don’t worry too much about purity and give it a try!

Rainwater Reptile Ranch Texas Chili
Revision level unknown [September 1993]

Ingredients
2.5 lbs ground turkey – we use 2 packages of Jennie-O extra lean. You can substitute ground beef or other types of meat if preferred.
1 or 2 large yellow onions, diced
32 oz salt-free tomato sauce (if you’re using canned, 4 8oz cans)
8 oz red wine
5 large fresh tomatoes without skins (or two 14oz. cans tomatoes)
1 cup dried pinto or pink beans (or two cans of ranch style beans, or no beans at all if you’re a purist)
2 tsp cumin
1.5 tsp paprika
.5 tsp ground mustard
.25 tsp cinnamon
.5 tsp garlic powder
1/2 cup chili powder (that stuff from the grocery store simply will not do, and it’s mostly salt. For great chili you want the good stuff from someplace like Pendery’s – we use a combination of Pecos red and several other varieties – darker flavors with medium heat are our favorite)
dash of cayenne pepper
1 tbsp oregano
1 tsp cilantro
1 tbsp cornmeal

Garnishes
1 diced white onion
your favorite type of cheese

Prepare the beans first. Dump 1 cup of dried beans into a 3 quart or larger pot of water. Bring it to a boil, turn it down to medium low for two hours. Check the water level occasionally and add water if it gets to low. In the last half hour drop in .5 tsp salt.

In a 6 quart pot or dutch oven, put in half of the diced onions, the tomato sauce, wine and tomatoes. Put the pot on low heat. Stir in the dried spices and chili powder. Don’t put the cornmeal in yet.

Prepare the meat. Add a little olive oil to a frying pan. Set heat on medium-high. Put a quarter of the diced onions into the pan and let them sizzle a little bit. Add half the ground meat and brown it. With turkey and some other meats, you’ll need to use the spatula to break the meat into the granularity you want in the final chili while you’re browning it. I prefer fine granularity of meat in my chili but others prefer larger chunks of meat. Once the meat is browned, dump the entire contents of the pan into your your chili pot. With 2 lbs of meat, you’ll need to repeat this process twice. If you’re using a meat other than turkey, you may need to adjust the spicing. You may also want to add a little salt with some meats.

When the beans are ready, drain and dispose of the water they boiled in, rinse them in a colander, then add them to the big chili pot. By the time your meat and beans have been added, your chili should have reached a boil. Let it boil for ten minutes, then turn the heat on the pot down to simmer. If the consistency is too thick, add a little water. Let the pot simmer for several hours, stirring occasionally. The taste will continue to improve the longer it simmers. About 10 minutes before serving, stir in the cornmeal. With meats that tend to be a bit greasy, like ground beef, the cornmeal will greatly improve the consistency of the chili.

Serve in a bowl and garnish with diced white onions and cheese on top. Serve with crackers or fritos. Enjoy with friends on a cold day whenever possible.

Steevithak’s Pecan Pie Recipe

Like Pecan Pies? I do and I’ve been working on a way to make one that doesn’t involve using corn syrup. It’s taken a few years to perfect this recipe. The family Thanksgiving dinner each year is about the only time I make one, so the testing and revision cycle is a bit extended.

I should also explain that the reason I want to avoid corn syrup is primarily for the taste. I loathe the stuff and always have. I’ve avoided it for years, even before research began to show that HFCS was bad for you. I’m by no means claiming that this pecan pie is healthy – it still contains massive amounts of sugar. So bake and eat at your own risk.

In place of corn syrup, I’ve used another type of invert sugar – cane syrup. I get this at the local farmers market but it should also be available in most grocery stores that carry organic products. Because one of my goals was to avoid the super-sweet machine-made flavor of corn syrup, I’ve opted to combine the cane syrup with a small amount of molasses. Molasses is actually the waste product of producing cane syrup and other refined cane sugars; all the vitamins, minerals, and taste ends up in the molasses while most of the pure sugar ends up in the syrup. By putting a little molasses in, you get a much darker, more complex taste. The exact ratio of cane syrup to molasses is something you’ll want to adjust to your own taste. The Rum and brown sugar were chosen for the same reasons, they add a bit more complexity to the taste.

You can also change the sweetness a bit by adjusting the ratio of pecans to filling. For a sweeter pie reduce the number of pecans to a single layer on the surface. To decrease the sweetness, increase the number of pecans so that about half the thickness of the pie is pecans.

Also, one note on the Cinnamon is due; I’m using true cinnamon, aka Ceylon cinnamon. If you’re using grocery store Cinnamon (actually called Cassia), then you’ll probably want to use only 1 teaspoon or leave it out altogether. The tastes are quite different. If you’re not sure which you have, you have Cassia, it’s the substance most commonly sold as “cinnamon” in grocery stores. And if you’ve never tasted true cinnamon, I highly recommend buying some and trying it out.

Ok, so on to the actual recipe.

Steevithak’s Pecan Pie
Revision 2.0 [2011-11-21]

1 Cup Cane syrup
2/3 Cup brown sugar
4 Tablespoon melted butter
1 Tablespoon dark rum
1 Tablespoon cinnamon
1 teaspoon molasses
1 teaspoon vanilla
1/2 teaspoon sea salt
4 eggs
1 1/2 cups broken pecans
1/2 cup pecan halves
2 9 inch unbaked pie shell

Pre-heat to 350 degrees, use rack in middle of oven

Prep fresh pecans:
Bring pan of water to boil. Blanch pecans in boiling water for 1 minute. Oils that lead to bitter pecans will form a dark scum on surface of water. Remove pecans and rinse well. Toast pecans at 350 F for 10-15 minutes.

Construct the crust
Combine two pie shells for double thickness to help offset sweetness of pie. If you’d prefer, you can also make your own crust. This is left as an exercise for the reader.

Make the filling
Microwave cane syrup in 30 second bursts, or set in a saucepan of warm water, until the syrup is pourable

Combine the syrup, brown sugar, melted butter, rum, salt, vanilla, cinnamon, and molasses in a large sauce pan. Heat to boiling point, stirring constantly. Boil for 1 minute. Remove from heat and let cool.

While syrup cools, beat eggs in a separate bowl until creamy. When the syrup has cooled below boiling, stir in the beaten eggs and broken pecans.

Bake the pie
Pour mixture into pie shell, add pecan halves on top by hand. Add aluminium foil to cover exposed pie crust around edge. Bake for about 50 to 55 minutes. The pie is done when the top layer forms a deep golden brown crust that is firm when tapped. Aluminium foil may be removed during last 15 minutes for a more well done crust edge.